Every press operator knows the moment a mold starts “drifting.” The parts are still running, but the process window shrinks: fill balance tightens, vent lines darken faster than they should, cooling circuits stop pulling heat evenly, and you find yourself nudging settings to keep parts within tolerance.
None of these points points to a machine problem. It’s almost always the mold telling you it’s accumulating something it shouldn’t.
What most teams call “cleaning” usually happens only after a defect forces the issue. But the reality is simpler and more costly: molds don’t lose performance suddenly; they lose it gradually, and residue is usually the first cause.
The question here is whether the cleaning method matches the type of buildup that’s forming.
This guide exists for the teams who deal with that drift every day. It breaks down how contamination actually forms, where it hides, and how to clean each part of the tool without damaging steel, killing polish, or shortening tool life.
More importantly, it explains how the right cleaning method and the right melt behavior upstream keep the mold stable, predictable, and capable of holding cycle time without constant adjustment.
If mold uptime, part consistency, and reduced interventions matter to your operation, this is the reference you’ll want on hand.
Key Takeaways
Mold cleanliness directly affects part quality: Burn marks, haze, short shots, and vent stains usually come from residue buildup, not machine settings.
Different residues need different cleaning methods: Polymer degradation, plate-out, rust, and mineral deposits each respond to specific techniques like solvent cleaning, ultrasonic, dry-ice, or descaling.
On-press vs offline cleaning serves different purposes: On-press cleaning prevents drift; offline cleaning removes carbon, clears vents, and restores cooling performance.
Cleaning systems improve consistency and reduce downtime: Ultrasonic units, dry-ice machines, spray cabinets, and descaling systems keep results repeatable across shifts.
Melt stability controls how often molds need cleaning: MD Plastics’ screw designs, valves, and melt-monitoring tools reduce carbon and outgassing, lowering mold fouling at the source.
Why Injection Mold Cleaning Matters
A mold doesn’t lose performance because of a single defect—it loses it because contamination slowly changes how the tool breathes, cools, and releases. Even small amounts of buildup in the wrong place can shift the entire process window.
How contamination affects production
Splay, burn marks, and cosmetic haze
When vents can no longer evacuate gases cleanly.
Short shots and flow hesitation
Caused by restricted vents, uneven cavity temperatures, or residue around gates and runners.
Knit lines and surface inconsistency
Often trace back to localized cooling imbalance or additives condensing on the mold.
Dimensional drift and longer cycles
Poor cooling-channel flow raises mold temperatures and increases cooling time.
Unstable operation and higher scrap rates
Residue disrupts how the mold fills and cools, making the process harder to keep within spec.
When these issues compound, they directly reduce output, increase rejects, and erode the mold’s overall lifespan. Many shops end up adjusting machine parameters to compensate, masking the root cause instead of correcting it.
The Three Contaminants That Cause Most Mold Problems
Not all residue behaves the same. Understanding the type of buildup is what determines the correct cleaning method.
1. Polymer Degradation Residue
Material that has overheated or stalled in the barrel, runner, or gate leaves behind carbonized deposits that darken vents, stain cavities, and cause burn marks.
2. Additive / Gas / Oil Plate-Out
Plasticizers, stabilizers, flame retardants, lubricants, and colorants can volatilize and recondense on cooler mold surfaces, especially on polished cavities and vents.
3. Rust & Mineral Deposits
Cooling water introduces minerals and oxygen that build inside channels or along coolant interfaces, raising mold temperature and slowing cycle time.
Contamination doesn’t just dirty a mold; it alters how the mold functions. That’s why cleaning matters long before the tool looks visibly dirty.
On-Press vs Offline Mold Cleaning
Mold cleaning falls into two categories, each serving a different purpose. Treating them as interchangeable is one of the fastest ways to create drift in part quality or cycle time.
On-Press Cleaning (Quick, Preventive)
On-press cleaning keeps a running mold stable without interrupting production.
What it typically involves:
Soft brushes
Cotton swabs
Mold-safe solvent wipes
Light residue removal around vents, cavities, and parting lines
What to avoid:
Steel picks
Abrasive pads
Any tool that can scratch a polish or close a vent
When it’s effective:
Early signs of plate-out
Minor surface haze
Light vent staining
Short, high-frequency interventions to slow contamination
On-press cleaning is about maintaining consistency, not restoring a mold.
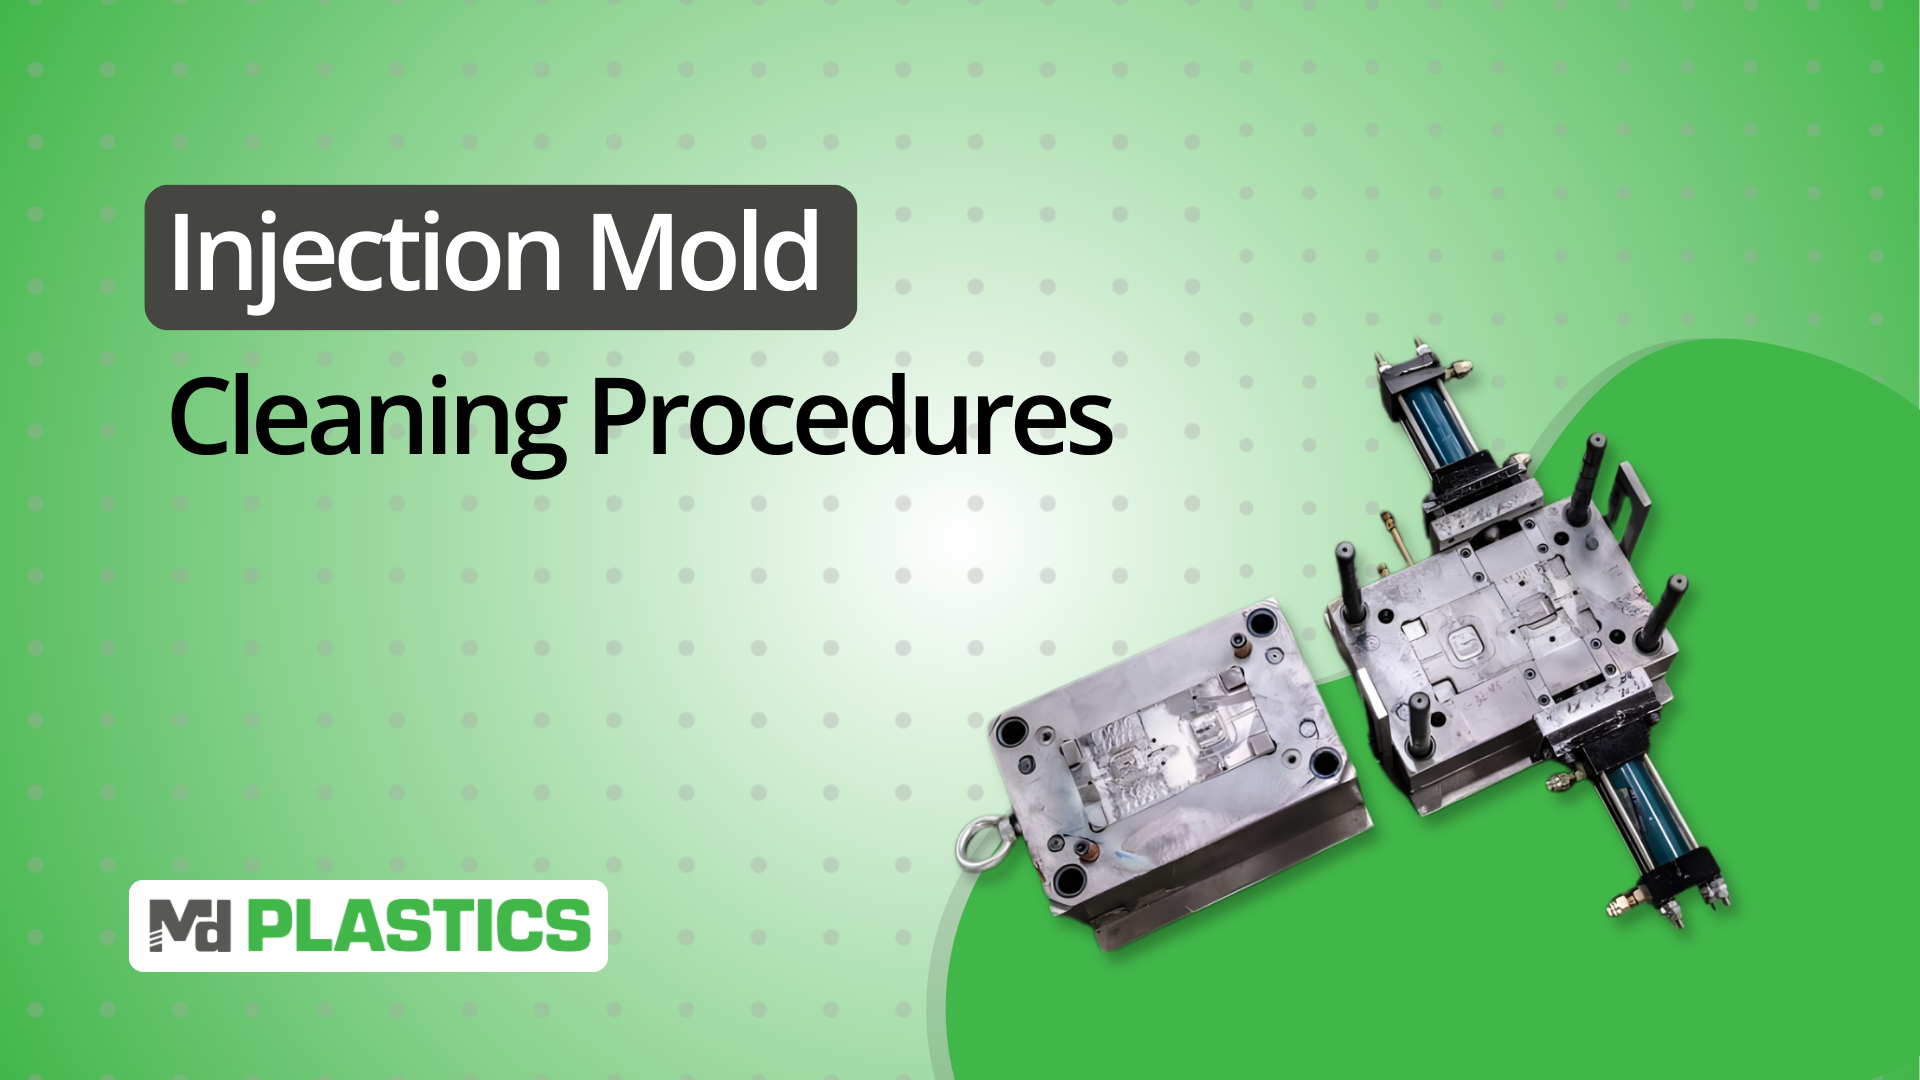
Offline Cleaning (Deep, Scheduled)
Offline cleaning is a full maintenance step performed when contamination begins affecting venting, cooling, or part appearance.
What it typically involves:
Pulling the mold from the press
Disassembly of inserts, pins, gates, and plates
Ultrasonic cleaning for detailed geometry
Dry-ice or media blasting when carbon is heavy
Descaling for cooling channels
When it’s necessary:
Carbon buildup that solvents won’t remove
Vents repeatedly clogging
Cooling channels showing reduced flow
Surface defects that reappear after on-press cleaning
After long runs of heat-sensitive or additive-rich resins
Offline cleaning restores the mold’s original performance window and prevents long-term degradation of steel, vents, and polish.
Step-by-Step Cleaning Procedures: By Mold Area
Cleaning a mold effectively depends on where the contamination sits. Each area collects residue for different reasons and requires its own technique. Using the wrong approach, being too aggressive, too mild, or simply misaligned can damage steel, close vents, or leave buildup behind.
Below is a structured, field-tested workflow for each critical mold zone.
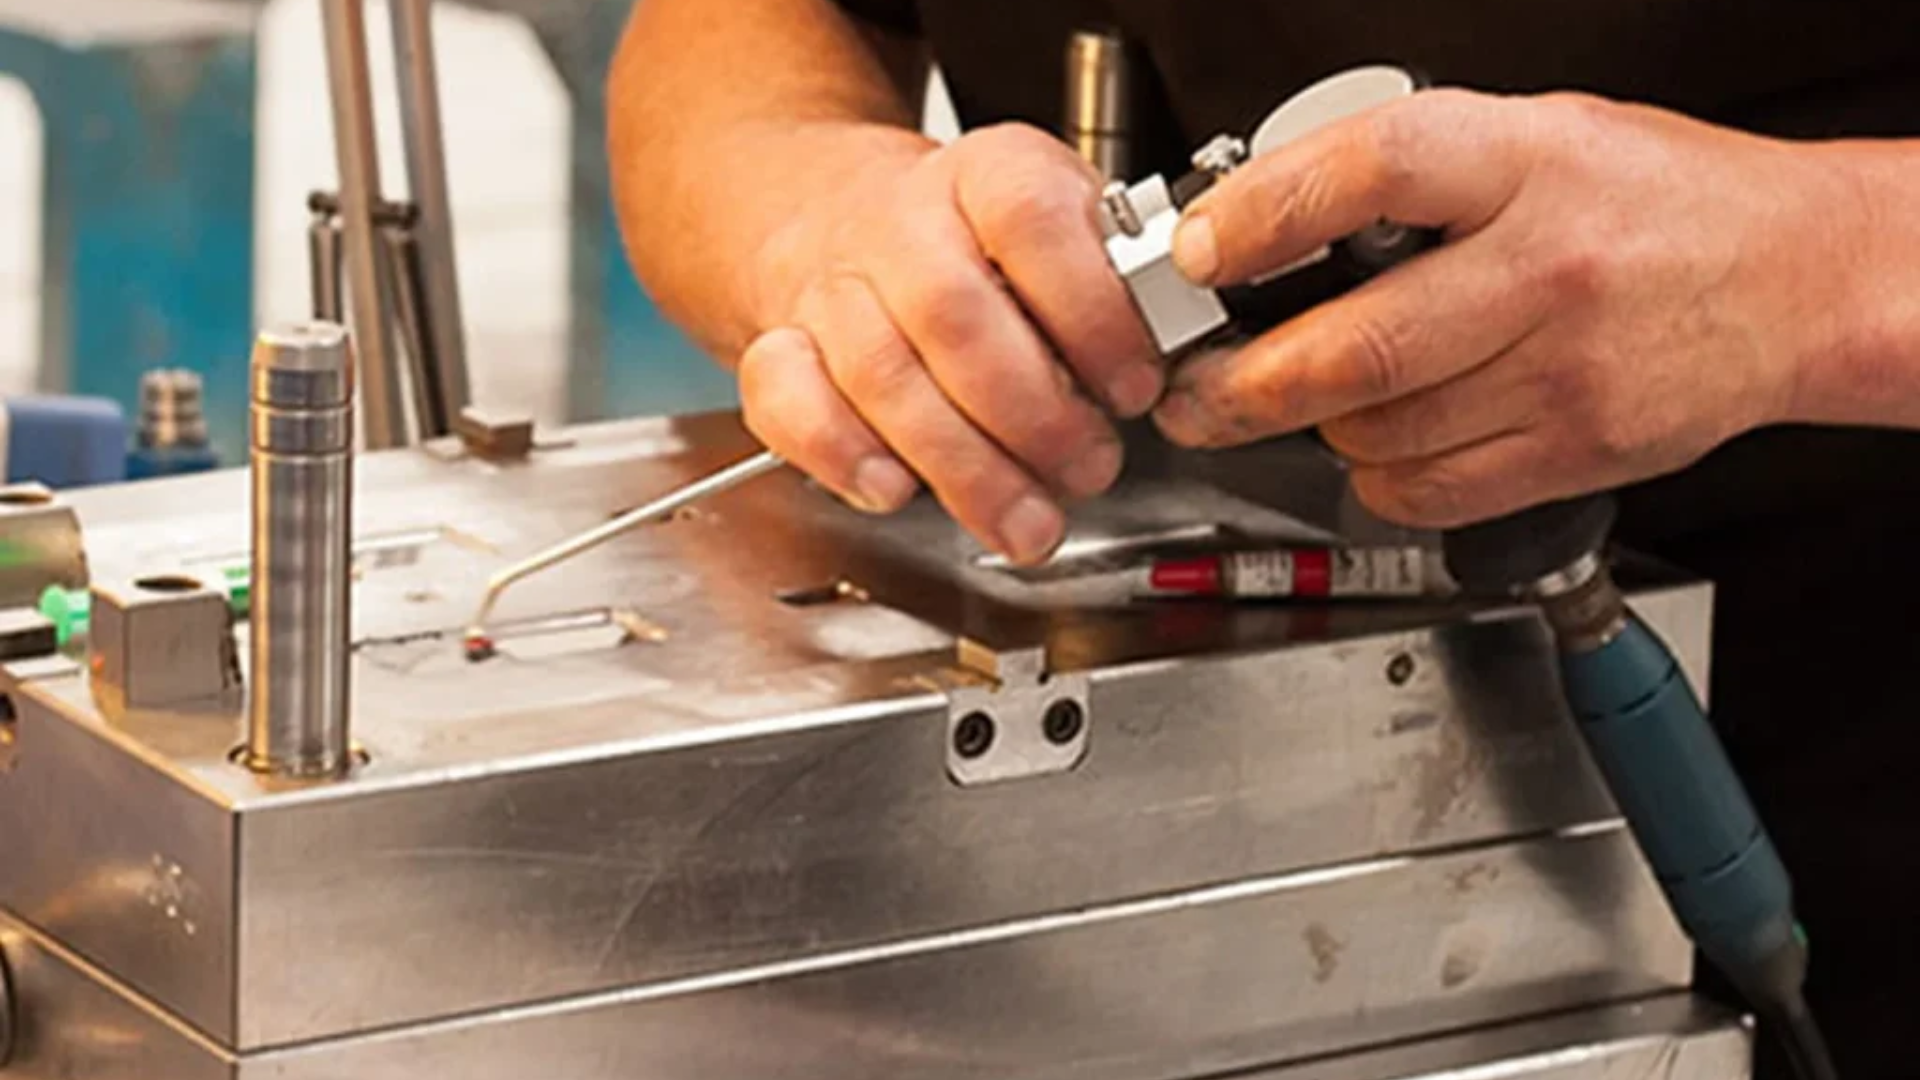
1. Cavity & Core Cleaning
Cavities and cores show contamination first because they’re the coldest major surfaces in the mold. Additive plate-out, slight polymer degradation, or gas deposits usually settle here.
How to clean them effectively:
Remove loose residue using compressed air or a soft brush.
Apply mold-safe solvent to lift oils, plate out, and light polymer film.
Use only non-marring tools (copper, brass, or plastic scrapers) for stubborn spots.
Avoid over-polishing—abrasives can change gloss levels or distort geometry.
Inspect for polish damage and micro-pitting before returning the mold to the press.
When done correctly, surface finish stabilizes, cosmetic defects drop, and cycle consistency improves.
2. Vent Cleaning (The Most Common Source of Defects)
Dirty vents are responsible for a large share of burn marks, splay, short shots, and flow lines. Even a small amount of residue affects gas evacuation.
Key steps:
Clean vent depths using thin, soft-edged scrapers designed for vents—never sharpen them further.
Address micro-vents with solvent and lint-free swabs; ultrasonic cleaning works best for very fine geometry.
Ensure vent depths remain within spec (typically 0.0005–0.002″ depending on the resin).
Check for vent polishing issues. Excess polishing can close vents unintentionally.
Warning signs of dirty vents:
Burn marks near parting lines
Splay on flow fronts
Increased mold temperature in localized regions
Hesitation marks or short shots
Vent cleaning often restores performance immediately because gas evacuation is fundamental to part quality.
3. Gate & Runner Cleaning
Gates and runners collect carbonized material more aggressively, especially with heat-sensitive resins or high-pressure shear conditions.
Cleaning workflow:
Remove gate inserts (where applicable) and clean them independently.
Use ultrasonic cleaning for intricate gate features, valve pins, or sharp transitions.
Clear carbonized residue with a mild abrasive media only on non-polished runner surfaces.
For hot runners: follow OEM protocols. Improper cleaning can damage heaters, thermocouples, or valve pins.
Goal: maintain clean flow paths so melt temperature and shear stay predictable.
4. Ejector Pins, Slides & Moving Components
Mechanical areas often fail due to contamination mixed with insufficient or excessive lubrication.
Maintenance steps:
Remove and degrease pins and slides using a non-chlorinated cleaner.
Inspect for galling, wear marks, or lubrication starvation.
Re-grease with the right amount; too little causes drag; too much causes burn marks or plate-out.
Check alignment and stroke smoothness before reassembly.
Clean moving components reduce drag-related defects and extend the life of the tool’s mechanical system.
5. Cooling Channel Cleaning (Often Overlooked but Critical)
Cooling channels directly control cycle time. Even minor scale or rust reduces flow and heat transfer.
Effective cleaning approach:
Perform descaling using approved chemical descalers designed for mold steels.
Flush thoroughly with deionized water to remove chemical residues.
Check flow rate with a flow meter compared to baseline specs.
Remove rust/mineral deposits that create hot spots or uneven shrinkage.
Document flow changes, decreasing flow over time, indicate the need for more frequent maintenance.
Impact: cleaner channels = tighter dimensional control + shorter cycles + more stable mold temperature.
Mold Cleaning Methods & Systems: What to Use and When

Every mold accumulates different types of residue, polymer degradation, carbon, plate-out, oxidation, and each requires a specific cleaning approach. These methods remove contamination without damaging steel, altering vent depths, or affecting polish.
Below is a method-by-method guide, with technical clarity on how each cleaning technique actually works.
Cleaning Methods: How Each Technique Works
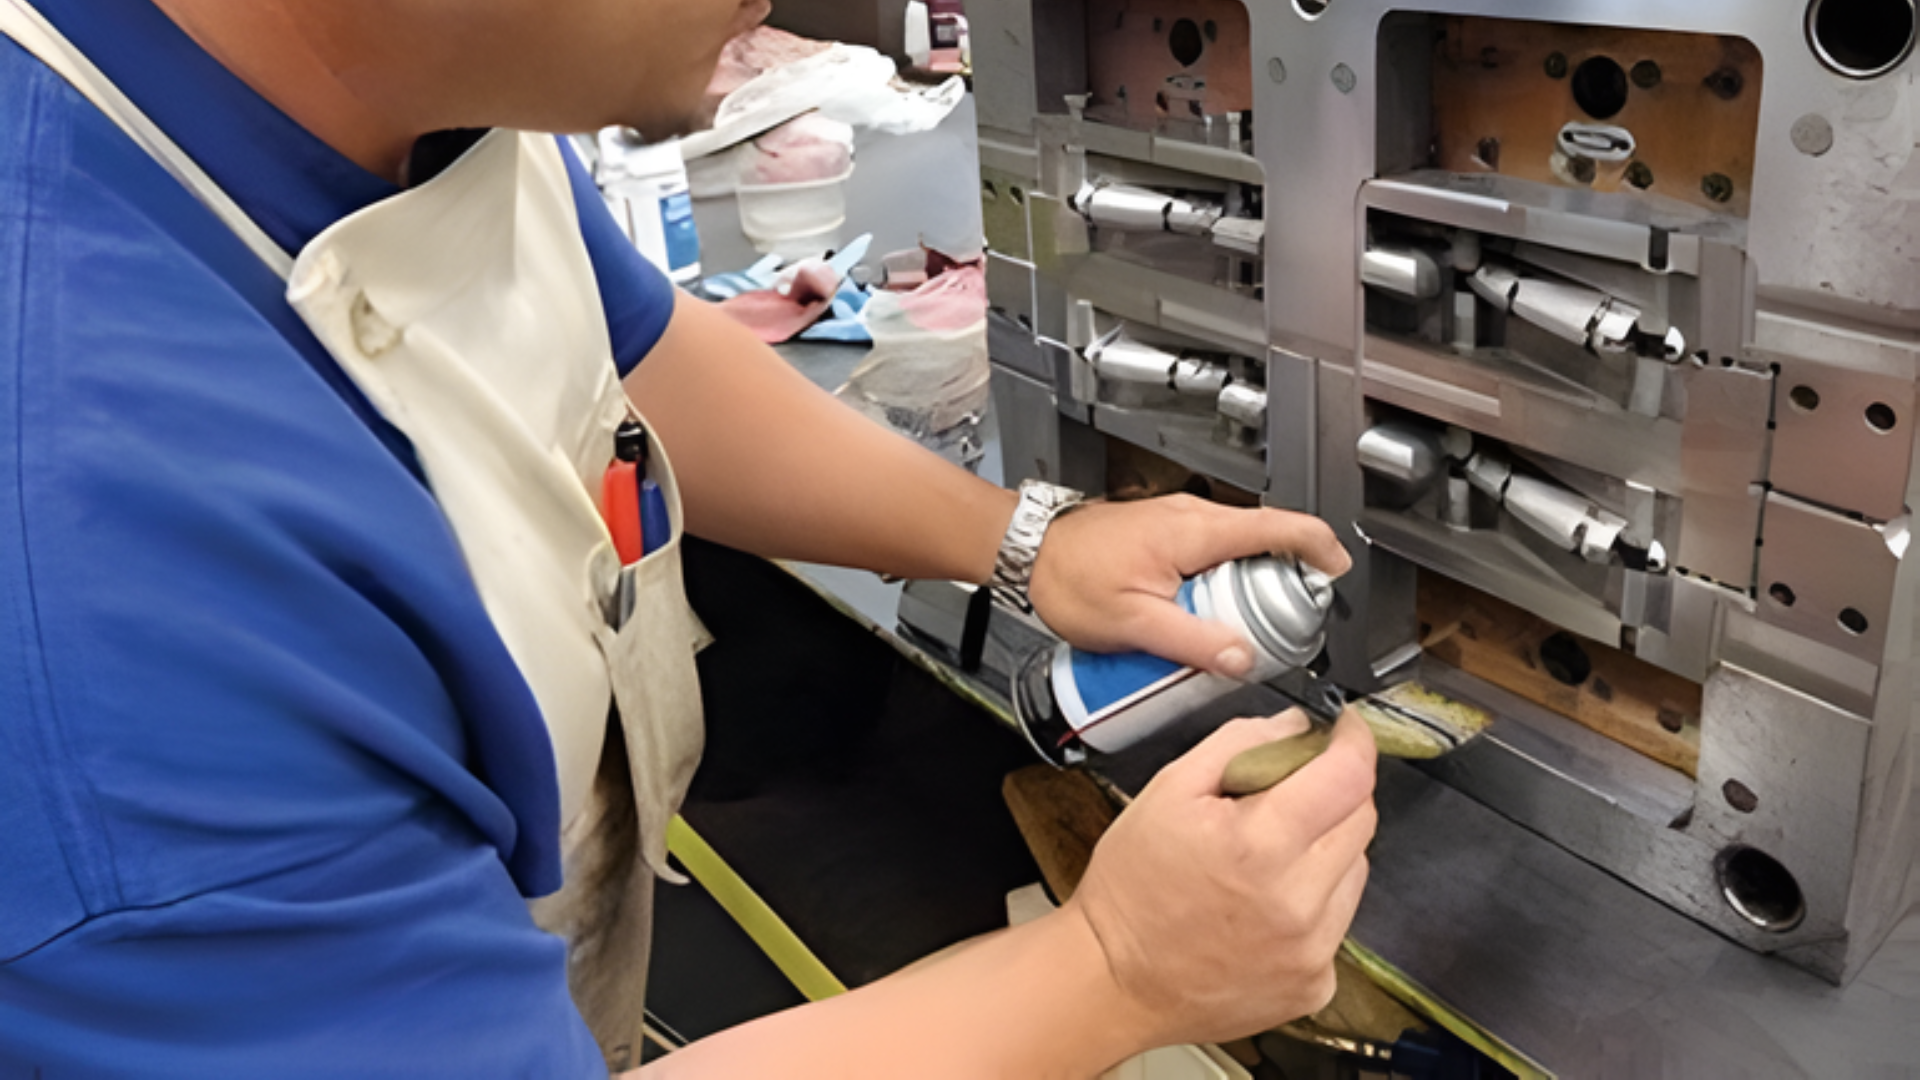
Solvent Cleaning
How it works:
Solvents dissolve and lift oils, plate-out, fingerprints, and light organic residue. When applied with lint-free wipes or soft brushes, they break down surface contaminants without affecting steel hardness or surface finish.
Best for:
Light residue
On-press touchups
Mold-safe wipe-downs between short runs
Limitations:
Cannot remove carbonized polymer
Excess solvent can dilute lubricants
Overuse may damage seals or O-rings
Ultrasonic Cleaning
How it works:
A tank generates high-frequency sound waves (typically 25–40 kHz) that create microscopic cavitation bubbles. When these bubbles collapse, they produce localized micro-jets that physically dislodge residue from vent slots, pins, gates, and internal geometry.
Best for:
Vents
Gate inserts
Fine features or deep cavities
Risks/Considerations:
High power can dull high-gloss surfaces
Requires correct detergent chemistry
Must rinse and dry components thoroughly afterward
Dry Ice Blasting (CO₂ Cleaning)
How it works:
Pellets of solid CO₂ hit the surface and instantly sublimate. This rapid phase change creates a micro-shock that lifts residue without abrasion. Since dry ice vaporizes, no secondary media remains in the mold.
Best for:
On-press cleaning
Cosmetic surfaces
Tools where media contamination is unacceptable
Advantages:
Zero residue
Non-abrasive
Minimal downtime
Media Blasting (Plastic, Walnut Shell, Soda)
How it works:
Soft media is propelled at the surface to mechanically remove corrosion, oxidation, or stubborn residue. The hardness of the media determines how aggressive the cleaning action is.
Best for:
Rust removal
Heavy carbon
Non-cosmetic surfaces (backside of plates, runners, structural surfaces)
Cautions:
Never use on polished or textured surfaces
Requires complete removal of media afterward
Media must match the steel type to avoid micro-pitting
Chemical Bath Systems
How it works:
A heated chemical solution dissolves carbonized polymer and oxidized material. Controlled temperatures ensure resin softening without affecting metal. Components are submerged until residue breaks down, then rinsed and neutralized.
Best for:
Burned-on resin
Old carbon deposits
Small to medium-sized inserts
Precautions:
Requires proper PPE
Must match chemistry to tool steel grade
Needs complete neutralization before drying
Thermal / Oven Cleaning
How it works:
Components are heated in a controlled oven until the polymer degrades into ash or flakes. Temperatures are kept below steel tempering thresholds to avoid softening or distortion.
Best for:
Small inserts
Components without lubrication
Removing thick resin layers before secondary cleaning
Risks:
Temperature overshoot can damage steel
Not for full mold assemblies
Must follow with ultrasonic or solvent cleaning to remove ash
Cleaning Systems: The Equipment Behind Proper Mold Maintenance
Cleaning systems standardize results, reduce dependency on operator technique, and shorten downtime. Here’s what each system contributes at a practical level:
Ultrasonic Cleaning Machines
Achieve consistent deep cleaning of small geometry
Ideal for vents, ejector pins, gate inserts
Adjustable frequency helps protect polished surfaces
Automated Parts Washers
Spray-based or agitation-based systems
Provide uniform cleaning for plates and medium-sized components
Reduce manual labor and variability
Solvent-Spray Cabinets
Closed-loop solvent use minimizes exposure and waste
Effective for degreasing and plate-out removal
Helpful for molds cleaned frequently between shifts
Dry-Ice Blasting Units
Enable on-press cleaning without mold removal
Extend the runtime between major cleanings
Ideal for cosmetic parts and textured tools
Cooling-Channel Descaling & Pumping Systems
Circulate descaling chemicals through channels
Restore flow rates and thermal balance
Prevent corrosion and mineral buildup
Selection Criteria (Choosing the Right System)
Selecting a cleaning system is about matching equipment to mold design, resin behavior, and the contamination profile.
Evaluate the following before choosing:
Mold Size & Steel Grade
Steels like H13, P20, and stainless steel tolerate different chemistries, ultrasonic intensities, and thermal exposure. Large plates may require automated washers; small inserts may benefit more from ultrasonic tanks.
Resin Type
PVC, PC, flame-retardant formulations, and high-additive materials produce corrosive acids or heavy carbon. These often require ultrasonic cleaning or chemical baths rather than solvent-only approaches.
Cleaning Frequency
High-cosmetic or high-volume tools usually justify automated systems because consistency matters more than operator time. Low-frequency cleaning may allow for simpler setups.
Labor Availability vs Automation
Shops with limited maintenance personnel benefit from automated washers and dry-ice systems. Facilities with a dedicated tooling department may manage manual processes effectively.
Safety & Environmental Requirements
Solvent rules, VOC limits, chemical disposal, and ventilation must align with the chosen cleaning system. Some regions restrict solvent cabinets; others require containment for ultrasonic chemistries.
ROI Expectations
The best system is the one that reduces downtime, stabilizes surface quality, and extends mold life. Even expensive systems often pay for themselves if they reduce one or two major unplanned stoppages.
In short, the right cleaning system is the one that removes your type of residue, fits your mold material and geometry, and can be repeated consistently across shifts without damaging the steel.
Autoclave Use in Injection Molding: When It Applies and When It Doesn’t
Autoclaves are often misunderstood in molding plants. They sterilize—they do not clean. In injection molding, their use is limited to very specific environments and tool types.
When Autoclave Cleaning Applies
Autoclaving is valid only when the priority is sterilization, not residue removal.
Medical and Cleanroom Molding
Tools used for medical tubing, syringes, IV components, or pharma packaging may require biological sterilization before entering a controlled environment.
Certain Silicone Molding Applications
Silicone tools used in medical-grade LSR processes may be autoclaved between runs to maintain sterility.
Scenarios Where Biological Decontamination Is Required
Autoclaves eliminate microbes, spores, and biological contaminants—something solvents and blasting cannot do.
Key point: Autoclaving ensures sterility, not cleanliness.
When Autoclaving Does Not Apply
Autoclaves do not remove molding-related contamination. They do not replace solvents, ultrasonic cleaning, or mechanical residue removal.
Cannot remove polymer residue
Any greases, plate-out, or degraded polymer will remain untouched.
Ineffective against carbon or oxidation
Carbonized resin and rust require mechanical or chemical removal.
It can cause corrosion if components are not dried immediately
Trapped moisture accelerates rust in cooling channels, ejector-pin bores, and fine vent slots.
Bottom line: Autoclaving is a sterilization step, not a mold-cleaning solution.
Preventive Mold Maintenance: How Often Should You Clean?
Cleaning frequency isn’t determined by hours of machine time; it’s driven by resin chemistry, thermal load, surface-finish requirements, and the cost of a defect.
The table below consolidates these factors, giving engineers a practical, decision-ready interval matrix.
Cleaning Frequency Guide:
Resin Behavior × Part Requirements
Use this table to determine realistic mold-cleaning intervals based on the buildup characteristics of the resin and whether the application is cosmetic or non-cosmetic.
Resin Category | Examples | Cleaning Interval (Cosmetic Tools) | Cleaning Interval (Non-Cosmetic Tools) | Notes |
|---|---|---|---|---|
High-Buildup Resins | PVC, PC, POM, flame-retardant grades | Every 8–24 hours | Every 1–2 days | Carbonize quickly; corrosive byproducts; vents clog fast. |
Moderate-Buildup Resins | ABS, PA, TPEs, filled PP/PE | Every 1–2 days | Every 2–3 days | Fillers + additives accelerate plate-out; watch hot spots. |
Low-Buildup Commodity Resins | PP, HDPE, LDPE, PS | Every 1–2 days | Every 3–7 days | Slower residue formation, but vents still narrow over time. |
Any Resin: High-Cosmetic or Medical Tools | Class A finishes, optical surfaces, medical molding | Every shift (or by shot count) | — | Surface haze, flow marks, or contamination are unacceptable. |
Important: These intervals assume stable melt handling.
If the melt temperature is drifting, shear is inconsistent, or backflow is occurring, the mold will foul faster. This is addressed later in the MD Plastics section.
Preventive Maintenance Checklist
A well-run mold room uses a structured PM routine that keeps tooling predictable across shifts:
Daily (On Press)
Wipe cavity surfaces with mold-safe solvent
Inspect vents for early blockage
Confirm ejector pin lubrication levels
Remove loose residues from parting lines
Monitor for early plate-out or haze
Per Production Run
Inspect gates and runners
Measure vent depths and clean if needed
Verify cooling flow rate and temperature delta
Clean ejector-pin bores and reapply controlled lubrication
Check O-rings and seals for wear
Weekly or Bi-Weekly (Depending on Resin)
Perform ultrasonic cleaning of inserts/vent components
Descale cooling channels if the flow is reduced
Clean hot-runner manifolds per supplier guidelines
Document all surface wear or corrosion findings
Lubrication & Rust Prevention (Critical for Mold Life)
A consistent lubrication routine prevents galling and extends component life:
Apply grease sparingly to prevent migration into cavities
Use food-grade or medical-grade lubricants when required
Protect mold surfaces during breaks/shift changes with rust inhibitor
Never apply lubricant to hot surfaces—trap moisture → corrosion
Rule of thumb: Over-lubrication causes more defects than under-lubrication.
Mold Storage Best Practices
How a mold is stored directly affects how it runs next time:
Dry mold thoroughly before storage
Apply corrosion inhibitor to polished surfaces
Seal water lines to prevent condensation
Store in a humidity-controlled area
Use protective plates to cover cavities and parting lines
Record the last run’s resin + issues for faster future troubleshooting
Documentation & Record Keeping
PM isn’t complete until it’s documented.
A high-performing shop tracks:
Cleaning intervals
Resin run history
Vent depth measurements
Cooling channel flow data
Repair actions and dates
Mold-condition photos after each major cleaning
This allows engineers to identify patterns early before defects escalate or tool damage occurs.
A structured preventive maintenance routine slows residue formation, but it can’t stop it entirely.
Common Contaminants and the Correct Cleaning Method
This section gives you a diagnosis → clean → prevent framework so you can correct problems fast and keep them from returning.
A quick reference chart every molding team should have posted at the press:
Contaminant | How It Appears | Root Cause | Best Cleaning Method | Prevention Insight |
|---|---|---|---|---|
Carbonized Polymer | Black specks, burn marks, splay | Overheating, melt stagnation, and high shear | Ultrasonic cleaning, chemical bath | Stabilize melt temp; inspect screw/valve wear |
Gas / Vent Blockage | Shorts, splay from trapped gas, parting-line burns | Vents clogged with residue | Vent cleaning, dry ice blasting | Maintain proper vent depth; increase purging frequency |
Rust / Mineral Contamination | Orange stains, pitting, and cooling imbalance | Moisture, poor drying, hard water scale | Media blasting, rust inhibitor | Descale channels; ensure proper mold drying |
Additive or Oil Plate-Out | Greasy film, cloudy surfaces, flow lines | Excess additives (lubricants, plasticizers) condense | Solvent cleaning, light on-press wipe | Adjust melt temp; verify material formulation |
Color Streaking / Pigment Carryover | Swirls, inconsistent color | Poor mixing or leftover pigment | Solvent + cavity cleaning, high-flow purge | Improve mixing; evaluate screw geometry |
Cooling Channel Blockage | Cycle time drift, hot spots, and dimensional variation | Scale, rust, or contamination inside channels | Descaling/flushing system |
Quick Diagnostic Guide
Use this when defects appear, but the root cause isn’t obvious:
If the defect moves around the part → vents are the culprit.
If the defect appears at the same spot every cycle → buildup in cavity/core geometry.
If defects increase during long runs, → degradation or plate-out.
If the mold starts clean but fails mid-shift → cooling blockage is developing.
If pigmented materials behave inconsistently → melt stability or mixing issue.
When Cleaning Alone Won’t Fix It
This is where many shops waste hours cleaning a mold that isn’t the root cause.
Cleaning won’t solve the problem if:
Melt temperature is drifting
Backflow is occurring inside the barrel
Screw wear is shifting the melt front
Resin moisture is high
The additive load is inconsistent
These lead directly into mold fouling. MD Plastics helps eliminate the conditions that cause mold fouling in the first place: unstable melt temperature, poor mixing, and backflow-driven degradation.
How MD Plastics Improves Mold Cleanliness Through Better Melt Quality
Most mold-cleaning problems don’t originate in the mold; they originate in the melt. When the melt is unstable, every downstream surface becomes a deposit point.
Five melt-related issues that directly increase residue inside the cavity:
Inconsistent melt temperature → degradation that chars and deposits onto vents
Poor mixing → pigment hotspots that burn on polished surfaces
Shear spikes → carbon formation that ends up in gates and runners
Backflow inside the barrel → dead zones where material overheats
Thermal instability → outgassing that coats cavities with oily plate-out
Cleaning addresses the symptom.
MD Plastics addresses the source.
1. Better Melt Stability → Less Carbon Buildup
Posi-Melt™ screw geometries deliver controlled shear and predictable melting.
This reduces the thermal surges that create carbon inside the barrel—carbon that would otherwise deposit on the mold.
Result: longer intervals between deep cleanings.
2. More Homogeneous Melt → Cleaner Cavities & No Color Streaking
Consistent distributive + dispersive mixing prevents:
pigment agglomeration
additive hotspots
uneven melting
Uniform melt means less soot on vents and fewer visual defects.
3. Stable Melt Temperature → Reduced Outgassing
With Posi-Melt™ and proper screw/barrel pairing, melt exits the barrel at a thermally uniform state.
Stable temperature significantly reduces:
plate-out
haze formation
chemical condensation on parting lines
This directly improves mold cleanliness and cycle-to-cycle repeatability.
4. High-Performance MDP™ Non-Return Valves → No Backflow, No Burn Pockets
MD Plastics’ MDP™ valves maintain consistent forward flow and eliminate the dead zones where polymer degrades.
Fewer degradation pockets = fewer carbon particles hitting the mold.
5. Melt-Profiler™ & Melt-IQ® → Detect the Conditions That Cause Fouling
These tools provide real-time insight into melt behavior:
temperature gradients
pressure stability
viscosity patterns
early wear indicators
This allows engineers to predict fouling, not just react to it, preventing buildup before it ever reaches the cavity.
Cleaner Melt = Cleaner Molds
When the melt is stable, well mixed, and consistently delivered, mold contamination drops dramatically.
Plants that pair strong cleaning practices with controlled melt quality experience:
fewer stoppages
longer mold life
more consistent part quality
lower maintenance frequency
If your molds foul faster than they should, the melt, not the mold, may be the real issue.
Explore MD Plastics’ melt-quality technologies to diagnose and eliminate the upstream conditions that create residue in the first place.
Conclusion
Effective mold cleaning is not a cosmetic exercise; it’s a performance discipline.
Correct procedures, consistent intervals, and the right cleaning systems keep vents open, cooling circuits efficient, part surfaces stable, and cycle times predictable. Preventive maintenance protects the mold, but more importantly, it protects quality, uptime, and overall equipment efficiency.
Yet even the best cleaning routine can only do so much if the melt feeding the mold is unstable. When the melt is well-mixed, thermally consistent, and free from degradation, molds stay cleaner longer and require fewer interventions.
That’s where MD Plastics’ engineered screws, valves, and melt-monitoring tools create measurable operational advantages.
To understand how real-time melt monitoring reduces the conditions that cause mold fouling, explore MD Plastics’ “Real-Time Monitoring Improves Process Control” feature.
It shows how better insight into melt behavior helps stabilize the process long before the residue reaches the mold.
FAQs
1. How often should an injection mold be cleaned?
Cleaning frequency depends on resin chemistry and part requirements.
High-buildup materials (PVC, PC, POM, FR grades) may need cleaning every 8–24 hours, while commodity resins may run several days. Cosmetic or medical tools require shift-based cleaning regardless of resin.
A structured PM schedule paired with melt-stability monitoring provides the most predictable intervals.
2. What’s the best way to remove carbon buildup?
For true carbonized resin, ultrasonic cleaning or a controlled chemical bath is typically the safest and most effective option.
Dry ice or solvent wipes won’t penetrate carbon bonded to the steel.
If carbon returns frequently, investigate upstream issues: melt overheating, shear spikes, or stagnant zones in the screw or valve.
3. Can I use an autoclave to clean an injection mold?
No — autoclaves sterilize, they do not remove polymer, carbon, plate-out, rust, or additives.
They are used only for biological decontamination in medical/cleanroom applications.
Actual mold cleaning still requires solvents, ultrasonic cleaning, or blasting.
4. What causes mold vent blockage?
Most vent failures come from a mix of:
plate-out from additives or oils
carbonized resin carried by the melt
moisture or corrosion
resin dust from high-shear processes
If vents clog quickly, check melt temperature stability and screw/valve wear; vent contamination often reflects upstream melt issues.
5. Is ultrasonic cleaning safe for polished or textured surfaces?
Yes, if the frequency and power are properly controlled.
Low-to-mid frequency settings are safe for most P20/H13 molds, but high-power cavitation can dull high-polish or optical surfaces.
Always verify the steel grade and finish before running a full cycle.